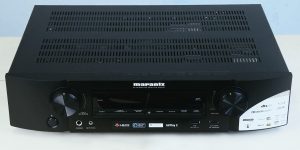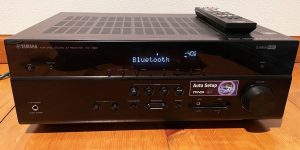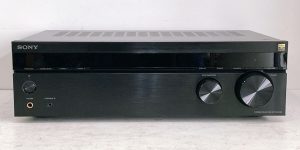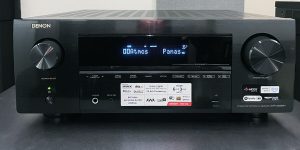
Yes, a blown receiver channel can affect the overall sound quality. In fact, this problem can occur for a variety of reasons, including power surges, excessive heat, faulty components, improper speaker impedance matching, or even your errors such as accidental miswiring. These factors can damage or malfunction the channel’s amplifier circuitry, resulting in distortion or no sound.
Fixing a blown channel requires a special approach that includes visual inspection, diagnostic tests, component replacement, and careful soldering.
By following proper repair procedures and taking preventive measures, such as using surge protectors, maintaining proper ventilation, and using compatible audio equipment, you can reduce the risk of channel burnout and ensure the optimal performance of the receiver.
In this guide, I’ll consider the main signs of a blown channel of the receiver and give you step-by-step instructions to help you fix this problem.
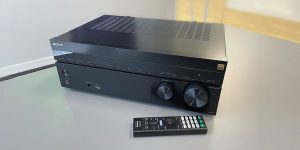
Identifying a blown channel

Identifying a blown channel in an audio receiver is essential for troubleshooting and resolving audio issues. To understand what happened to your receiver, I have prepared for you a list of symptoms of this problem, as well as steps to diagnose it. Let’s look at this in more detail.
Symptoms of a blown channel
When dealing with a blown channel on a receiver, several telltale symptoms can help identify the issue. Here is a unique list of signs indicating a blown channel:
| Symptoms | Description |
|---|---|
| No audio output | The affected channel may produce no sound at all or be significantly distorted or muffled compared to the other channels. |
| Uneven sound distribution | You may notice an imbalance in the audio output, with one channel being noticeably louder or quieter than the others or will not be working at all. |
| Intermittent audio | The blown channel might exhibit sporadic audio signals, cutting in and out unexpectedly or producing crackling noises. |
| Lack of clarity | The sound quality on the affected channel may suffer, sounding muddy, distorted, or lacking definition. |
| Loss of specific frequencies | Certain frequency ranges, such as low bass or high treble, may be absent or diminished on the blown channel. |
| Channel imbalance | When adjusting the balance control, the affected channel may not respond appropriately, resulting in an uneven stereo image. |
| No response to adjustments | Despite adjusting volume, tone, or other settings, the blown channel remains unresponsive, indicating a possible issue. |
These symptoms can help identify a blown channel and guide the troubleshooting process to rectify the problem effectively.
Diagnostic steps
We move on, and it’s time to talk about diagnosing the problem. I have compiled a table with steps that will help you identify the cause of your blown channel on a receiver and get you closer to solving this problem.
| Steps | Description |
|---|---|
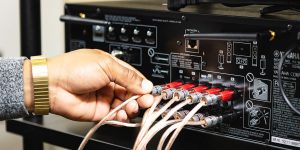
| Visual inspection | Examine the receiver for any visible signs of damage, such as burnt components or loose connections. Repair or replace any obvious issues. |
| Swap speakers and cables | Connect the suspected blown channel to a known working speaker and vice versa. If the problem follows the channel, it indicates an internal issue. |
| Balance control test | Adjust the balance control to the affected channel. If there is no change in volume, the problem likely lies within the receiver. |
| Input testing | Connect different audio sources to the affected channel to determine if the issue persists across all inputs or specific sources. |
| Multimeter readings | Measure voltage, resistance, and continuity across the circuitry of the blown channel to identify any abnormalities. |
| Signal tracing | Use an oscilloscope or audio probe to trace the audio signal path through the blown channel, looking for areas with signal loss or distortion. |
| Component testing | Test individual components within the blown channel, such as transistors or capacitors, using appropriate equipment to detect faulty parts. |
| Soldering inspection | Inspect solder joints for any cold or cracked connections that may disrupt the channel’s functionality. Re-solder if necessary. |
| Service manual reference | Consult the receiver’s service manual or schematic diagrams to identify specific test points or troubleshooting guidelines. |
| Professional assistance | If unable to diagnose or repair the blown channel, consider seeking help from a professional technician with expertise in audio equipment. |
I hope that my table will help you determine the reason why your receiver’s channel burned out. Having identified the problem, it will be much easier for you to solve it.
How to fix a blown channel: a step-by-step guide

We have reached the most important part and will talk about how to fix a blown channel on a receiver. I have again prepared a table for you with detailed steps to repair your device. Let’s look at it in more detail.
| Steps | What should you do | Description |
|---|---|---|
| 1 | Identify the blown channel | Determine which channel is affected by listening for audio irregularities or using a balance control test. |
| 2 | Power off and disconnect | Turn off the receiver and unplug it from the power source to ensure safety during the repair process. |
| 3 | Visual inspection | Inspect the blown channel for any visible signs of damage, such as burnt components, loose connections, or damaged wires. Repair or replace as necessary. |
| 4 | Swap speakers and cables | Connect the suspected blown channel to a known working speaker and vice versa. If the issue follows the channel, it indicates an internal problem. |
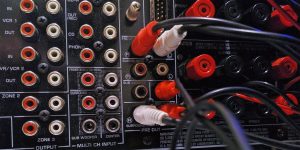
| 5 | Clean connections | Ensure all speaker wire connections, RCA plugs, and other audio connections are clean and secure. Use contact cleaner if needed. |
| 6 | Final testing | Reconnect the receiver, power it on, and test the repaired channel with various audio sources. Ensure that the sound output is clear, balanced, and matches the other channels. |
These steps should help you repair your hardware. In addition, do not forget about the quality maintenance of equipment and methods for preventing breakdowns. We will talk about this in the next section of our article.
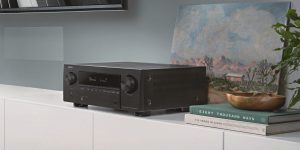
Preventing blown channels in the future
As a specialist in this field, I want to say that it is important not only to be able to find the problem and fix it but also to take care of the equipment, including the receiver, in order to prevent its channels from burning out. I have prepared 10 tips to help you prevent similar problems in the future. Let’s consider them in more detail.
- Maintain mindful volume control. Avoid cranking the volume to maximum levels for prolonged periods to prevent amplifier strain and overheating.
- Ensure adequate ventilation. Keep the receiver in a well-ventilated area with proper airflow, away from obstructions and heat-generating devices.
- Invest in quality speakers and cables. Choose high-quality components capable of handling the receiver’s power output without strain or signal loss.
- Perform regular maintenance. Clean dust and debris from the receiver’s vents and connections periodically to prevent buildup and potential damage.
- Protect against power surges. Connect the receiver to a surge protector or UPS to safeguard against electrical fluctuations and unexpected surges.
- Establish a balanced audio setup. Ensure speakers are properly placed and audio levels are balanced across all channels to avoid excessive strain.
- Follow manufacturer guidelines. Adhere to the recommended usage, maintenance, and compatible component guidelines provided by the manufacturer.
- Avoid impedance mismatches. Use speakers and amplifiers with compatible impedance ratings to prevent undue channel strain.
- Monitor cable connections. Regularly inspect and secure speaker wire connections to prevent issues caused by loose or frayed wires.
- Practice proper shutdown. Power off the receiver when not in use to minimize stress on its components and reduce the risk of electrical damage.
By following these preventative measures, you can minimize the likelihood of blown channels and ensure your receiver’s optimal performance and longevity.
In this article, I looked at the causes and symptoms of a blown channel of a receiver. I’ve also given you instructions on how to fix this problem and how to prevent it in the future. I hope my recommendations will help you deal with your problem and solve it as soon as possible.