Connecting speakers to an AV receiver or amplifier doesn’t seem troublesome at first. But once you need to wire different speakers to these devices, and it appears that you need to deal with wire connections, everything looks far more complex.
Still, if you read my guide on how to connect a speaker wire just once, everything becomes simple and understandable for you. That’s why before doing any manipulations with your audio equipment, I strongly recommend reading this article. So, let’s not lose any minute more and dive into the topic in as much detail as possible.
What you need to know about a speaker wire

A speaker wire, also known as an audio cable or speaker cable, is a type of electrical cable used to connect audio equipment, such as amplifiers or receivers, to speakers. It carries the electrical signals from the audio source to the speakers, allowing the sound to be reproduced.
Speaker wires are typically made up of two conductors, often referred to as positive (+) and negative (-) or sometimes as red and black wires. These conductors are usually made of copper or copper-clad aluminum. The wires are insulated to prevent electrical shortcircuits or interference.
The gauge or thickness of the speaker wire can vary, with lower gauge numbers indicating thicker wires. Thicker wires have less resistance and can carry more current, which is beneficial for longer cable runs or when using high-power speakers.
When connecting speaker wires to audio equipment, the positive terminal of the speaker is connected to the positive terminal of the amplifier or receiver, and the negative terminal of the speaker is connected to the negative terminal of the amplifier or receiver. This ensures that the audio signal is properly transmitted from the source to the speakers, allowing for accurate sound reproduction.
How to determine where’s the positive and where negative speaker wire end?
To determine which end of a speaker wire is positive (+) and which one is negative (-), you can follow my guidelines:
- Insulation color. Many speaker wires are color-coded to indicate polarity. The insulation on one wire may be marked with a solid color (e.g., red) or a stripe, while the other one may have a different color (e.g., black) or no stripe. The wire with the marked or solid color is usually the positive wire.
- Printed markings. Some speaker wires have printed markings along the length of the insulation. These markings may include “+” or “-” symbols, text indicating polarity, or other identifying information.
- Manufacturer’s markings. Speaker wires often have manufacturer markings on the insulation. These markings may provide information about polarity, such as “+” or “-“.
If your speaker wires do not have any visible indicators of polarity, you can use the following methods to determine it:
- Examine the wire closely. Speaker wires typically consist of two conductors twisted or bound together. One of the conductors may have a slightly shinier appearance or a distinguishing mark. This conductor is likely the positive wire.
- Trial and error. If you are unable to identify any visual cues, I advise you to try a simple trial-and-error method. Connect one end of the wire to a speaker or an audio source and the other end to the corresponding terminals on the amplifier or receiver. Listen to the sound produced. If the audio sounds are distorted, weak, or out of phase, reverse the connection at one end (swap the wires) and listen again. The correct polarity is when the sound is clear and properly balanced.
Remember, it is crucial to maintain consistency in the polarity of all speakers within a system. Inaccurate polarity can result in phase cancellation and degrade the sound quality.
How to connect speakers with a speaker wire?

For connecting your speaker to an amp or AVR using a speaker wire, follow these steps:
- Prepare the wires. Strip a small section (about 1/2 inch or 1.3 cm) of insulation from the ends of the speaker wire to expose the bare metal conductors. You can use wire strippers, a sharp knife or scissors to remove the insulation.
- Identify the positive and negative terminals. Most speakers have terminals labeled with “+” (positive) and “-” (negative) signs or with red and black color coding. Identify the terminals on both the speakers and the audio source.
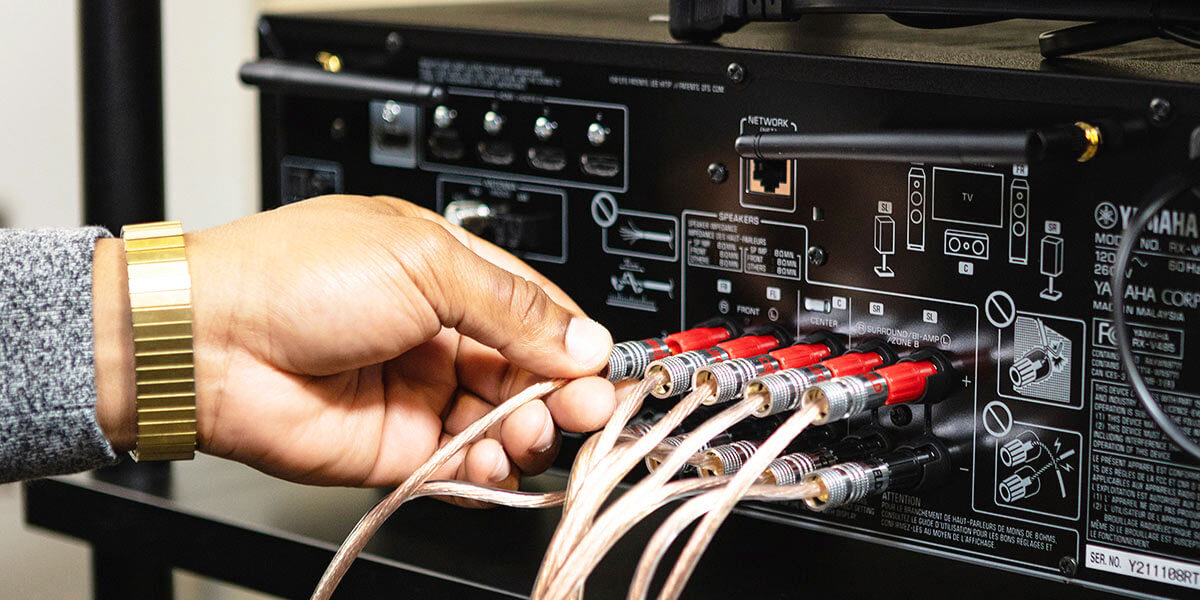
- Connect the wires to the speakers. For each speaker, take the positive end of the speaker wire (marked or identified as the positive conductor) and connect it to the positive terminal on the speaker. Insert the exposed wire into the terminal, ensuring a secure connection. It’s common to use binding posts, spring clips, or banana plugs on speakers for easy wire attachment. Repeat this process for the negative end of the wire, connecting it to the negative terminal on the speaker.
- Connect the wires to the audio source. Take the other ends of the speaker wires and connect them to the corresponding terminals on the audio source, such as an amplifier or receiver. Connect the positive wire to the positive terminal and the negative wire to the negative terminal. Ensure a secure connection by inserting the exposed wire into the appropriate terminal or using binding posts, spring clips, or banana plugs if available.
- Secure the connections. Once you connect a speaker wire to the receiver or amp, make sure it is secure and tight. Loose connections can cause signal loss or affect sound quality. If using binding posts or spring clips, tighten them appropriately to ensure a solid connection.
- .
- Repeat for other speakers. If you have multiple speakers, repeat the above steps for each speaker, connecting them to the appropriate terminals on the audio source.
- Test the setup. After all the connections are made, turn on your audio source and play some audio to test the speakers. Ensure that sound comes from each speaker and that it’s clear and balanced. Adjust the volume levels as desired.
What happens if I connect the speaker wires incorrectly
It’s so much about the human nature to make mistakes. When connecting speaker wires to an amplifier or AVR, mistakes can also happen. They are not fatal and can be corrected, but each has specific consequences:
Connect the left speaker to the terminals marked on the right on the receiver
This situation can cause 2 issues:
- Reversed stereo imaging. Instruments and sounds that are supposed to be on the left side of the soundstage will be heard from the right side, and vice versa.
- Phase cancellation.Reversing the channels can result in phase cancellation, leading to a loss of certain frequencies or a hollow, unnatural sound.
To correct this issue, I advise just swapping the speaker connections on the receiver to match the appropriate left and right channels. Disconnect the speaker wires from the receiver, and reconnect them to the correct terminals: the left speaker wire to the left channel terminals and the right speaker wire to the right ones. Ensure the positive and negative wires are correctly connected as well.
Connect the positive to the negative terminals
I don’t recommend ever making this mistake because it will result in great sound distortion. Here are the effects of connecting the speaker wire to the receiver incorrectly:
- Phase cancellation. When the speakers are out of phase, the audio signals from each speaker will be in opposition. This can cause certain frequencies or parts of the audio signal to cancel each other out, resulting in a loss of sound quality, diminished bass response, and an overall thin or hollow sound.
- Imbalanced stereo image. Reversing the phase can disrupt the stereo image and the localization of sounds. Instruments and vocals that should be centered or positioned to the left or right in the audio mix may sound shifted or displaced.
Types of speaker wire connections

There are several types of speaker wire connections commonly used to connect a speaker to an amp or AVR. Here are some of the most common types:
Spring clips
Spring clips are found on many entry-level or compact audio systems. They consist of a metal clip that can be opened by pressing down or pulling back, allowing the speaker wire to be inserted. When released, the spring clip applies pressure to hold the wire securely in place.
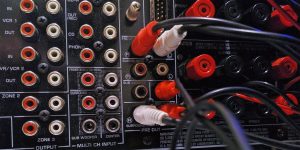
Binding posts
Binding posts are a popular type of speaker wire connection. They consist of two posts, typically color-coded for positive (+) and negative (-) connections. The speaker wire is inserted into the openings or wrapped around the posts and then tightened down using screws or knobs to secure the connection.
Speaker wire connector types
It’s also possible to connect speakers to a receiver or amplifier with bare wire, without special tips. Still, in most cases, they are necessary, and here’s the list of the most common types of speaker wire connectors.
Pin connectors
Pin connectors have a thin, straight metal pin that can be inserted into binding posts. They are commonly used with spring-loaded binding posts or older speaker terminals that lack other connector options. Pin connectors may require the user to unscrew or loosen the binding post before insertion.
Banana plugs
Banana plugs are popular speaker wire connectors. They have a cylindrical shape with a pin or socket on one end that can be inserted into binding posts on speakers and amplifiers. Banana plugs provide a secure and convenient connection and are often color-coded for polarity identification.
Spade connectors
Spade connectors have a flat, U-shaped design that can be inserted and secured under the binding posts. They offer a reliable and solid connection and are particularly useful for larger gauge wires. Spade connectors come in different sizes to accommodate various binding post sizes.
Why do I need to use speaker wire connectors
I strongly recommend using speaker wire connectors because they have numerous benefits. Here are some reasons why speaker wire connectors are commonly used:
| Reason | Description |
|---|---|
| Ease of installation | Speaker wire connectors typically feature a standardized design that easily interfaces with binding posts or terminals, making the installation process quicker and more straightforward. |
| Secure connection | They help prevent loose connections or accidental disconnections, which can impact the sound quality and overall performance of the speakers. |
| Polarity identification | Many speaker wire connectors, such as banana plugs and twist-on connectors, are color-coded for polarity identification. |
| Protection and insulation | They can help shield the exposed wire from potential damage, such as short circuits, fraying, or accidental contact with other components, ensuring the safety and longevity of the audio system. |
| Flexibility and versatility | They facilitate easier swapping or repositioning of speakers without the need for re-stripping or re-terminating the wire, saving time and effort. |
| Compatibility | By using the appropriate connectors, you ensure a proper fit and compatibility between the wire and the equipment, optimizing the audio signal transmission. |
While it is possible to connect speakers using bare wire connections, using speaker wire connectors offers convenience, reliability, and improved performance. However, I also advise you to consult the manufacturer’s guidelines or specifications for your specific audio equipment to determine the recommended connector type.